
Writing your first smart contract and deploying it to Rinkeby test net
Basically a Hello World smart contract


Table of contents

No headings in the article.
This tutorial will help you write a smart contract using solidity and then deploy it on Rinkeby test net. We will first set a value on the network and then we would retrieve it.
Prerequisites:
- Metamask(Browser extension) should be installed.
- Once you install Metmask go to settings -> Advanced -> show test nets.
- Select Rinkeby test net.
- Get some test Ethereum using faucets online (These are websites that will provide fake Ethereum to test your applications).
Following are some websites which you could use
Step 1: Go to remix.ethereum.org (Remix is an online IDE that helps in writing solidity code online)
Step 2: In this example, we'll be using 2 methods, one setter method to store a value and one getter method to retrieve a value. Since the setter method requires you to mint a block and store information on it, it'll require a gas fee (Gas fees are payments made by a user to compensate for the computing energy to process and validate a transaction).
Step 3: First, we would define the variable, in which we want to store our value.
string public str;
Like all programming languages, Solidity also has constructors, so we'll use it to define our initial value.
constructor(){
        str = "Hello World";
    }
After that, we will write a method to store our value on the Ethereum blockchain.
function store(string memory value) public {
        str = value;
    }
Here the memory keyword is used to tell the smart contract to store the value temporarily. Eg: how information is stored on the RAM. Since Ethereum virtual machine has limited memory, data stored here is lost between function calls.
Now to retrieve the data we would write a method that returns the current value stored.
function retrieve() public view returns (string memory){
        return str;
    }
Now click on compile and make sure that there are no errors in the smart contract.
Step 4: Now that we have written the basic code for our smart contract, the next step would be to deploy it on the test network.
Go to the "Deploy and run Transactions tab" and then click on the environment's dropdown.
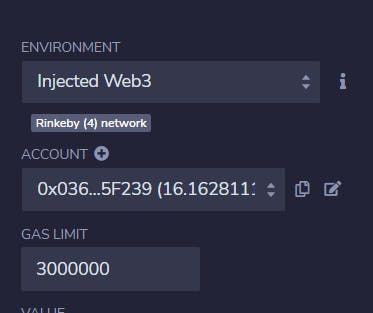
Click on Injected Web3 option. At this point in the accounts tab below, you should see your wallet's address along with the test Ethereum that you have.
Now if you click on deploy it would open Metamask and tell you to sign a transition, this is because you are deploying your smart contract on the test network. (Don't worry you'll be paying in fake Ethereum). Once the contract is deployed you would see a similar message in the console.

This means that the contract has been successfully deployed.
Now click on deployed smart contracts tab shown below
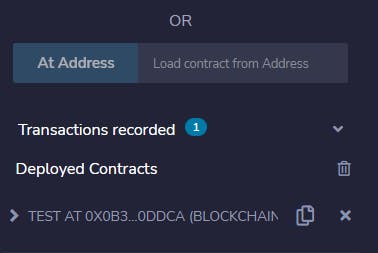
It would open the methods that you have exposed in your smart contract. Since we had 2 methods store and retrieve you'll see that.

As shown above , if you click on the retrieve tab it would return the initial value that we had set using the constructor.
Now if we write a value inside the store method and click on store, it would open the Metamask extension and tell you to sign the transaction, this is because we are telling the smart contract to store value on the blockchain network.
If we click on retrieve it should return the current value that we have stored on the network.
Congratulations, You have now successfully deployed your first smart contract on the Rinkeby test net.